The Start Screen gives access to the tools required to
prepare the slicer for the next tissue sample.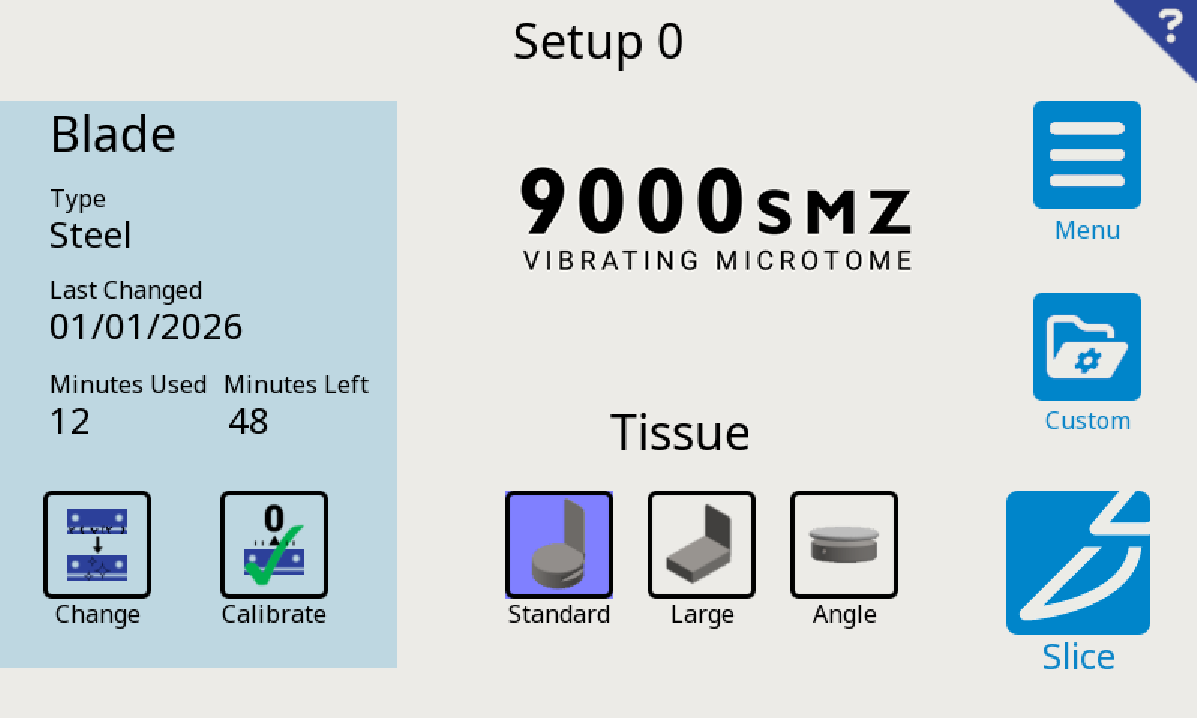 The
Start screen can be entered either from a fresh power up or from the Menu screen, by pressing the
The
Start screen can be entered either from a fresh power up or from the Menu screen, by pressing the  Start button.
The Stage and Advance axis of the instrument are moved to the "Load" position (the stage and advance are fully retracted).
The screen gives information on blade usage. If a blade is changed, then the 'Blade' information will appear on a red background.
From the Start screen, the following options can be found:
- Slice: Select
 to Load the tissue bath to the home position and begin slicing. A tissue bath must be fitted to proceed. See
section 13 to position the blade ready for the first slice.
to Load the tissue bath to the home position and begin slicing. A tissue bath must be fitted to proceed. See
section 13 to position the blade ready for the first slice. - Change:
Select the change
 button when a blade change is required.
This option allows a reset and adjustment (if required)
of the blade change timer. It also allows for a selection of blade type
being used; this is important as the instrument uses this for the Opti-Cal
routine. Refer to section 8 when changing the blade.
button when a blade change is required.
This option allows a reset and adjustment (if required)
of the blade change timer. It also allows for a selection of blade type
being used; this is important as the instrument uses this for the Opti-Cal
routine. Refer to section 8 when changing the blade. - Calibrate: Select
 to set the blade edge parallel to the cutting plane for optimum slice quality. See Blade Alignment in section 11.2.
 - Change Tissue Mount type: touch the image corresponding to the correct Tissue Mount


 to select. This allows the instrument to adjust the slice datums according to the different dimensions of the Tissue Mount. Default is set to
"Standard."
to select. This allows the instrument to adjust the slice datums according to the different dimensions of the Tissue Mount. Default is set to
"Standard." - Custom: Select
 load a different Custom Setup
(see
Section 15). The current setup is displayed on screen.
load a different Custom Setup
(see
Section 15). The current setup is displayed on screen. -
Menu: Select
 to access
the Menu screen (see Section 16).
to access
the Menu screen (see Section 16).
Proceed to section 11.
 |
If this is the first time using this instrument, you will need to select, calibrate the blade and choose the tissue mount. CUSTOM will be irrelevant for now as the 9000SMZ only has factory defaults set. |