Please follow the procedure below to update the 9000SMZ to the latest firmware versions:
- Switch the 9000SMZ OFF.
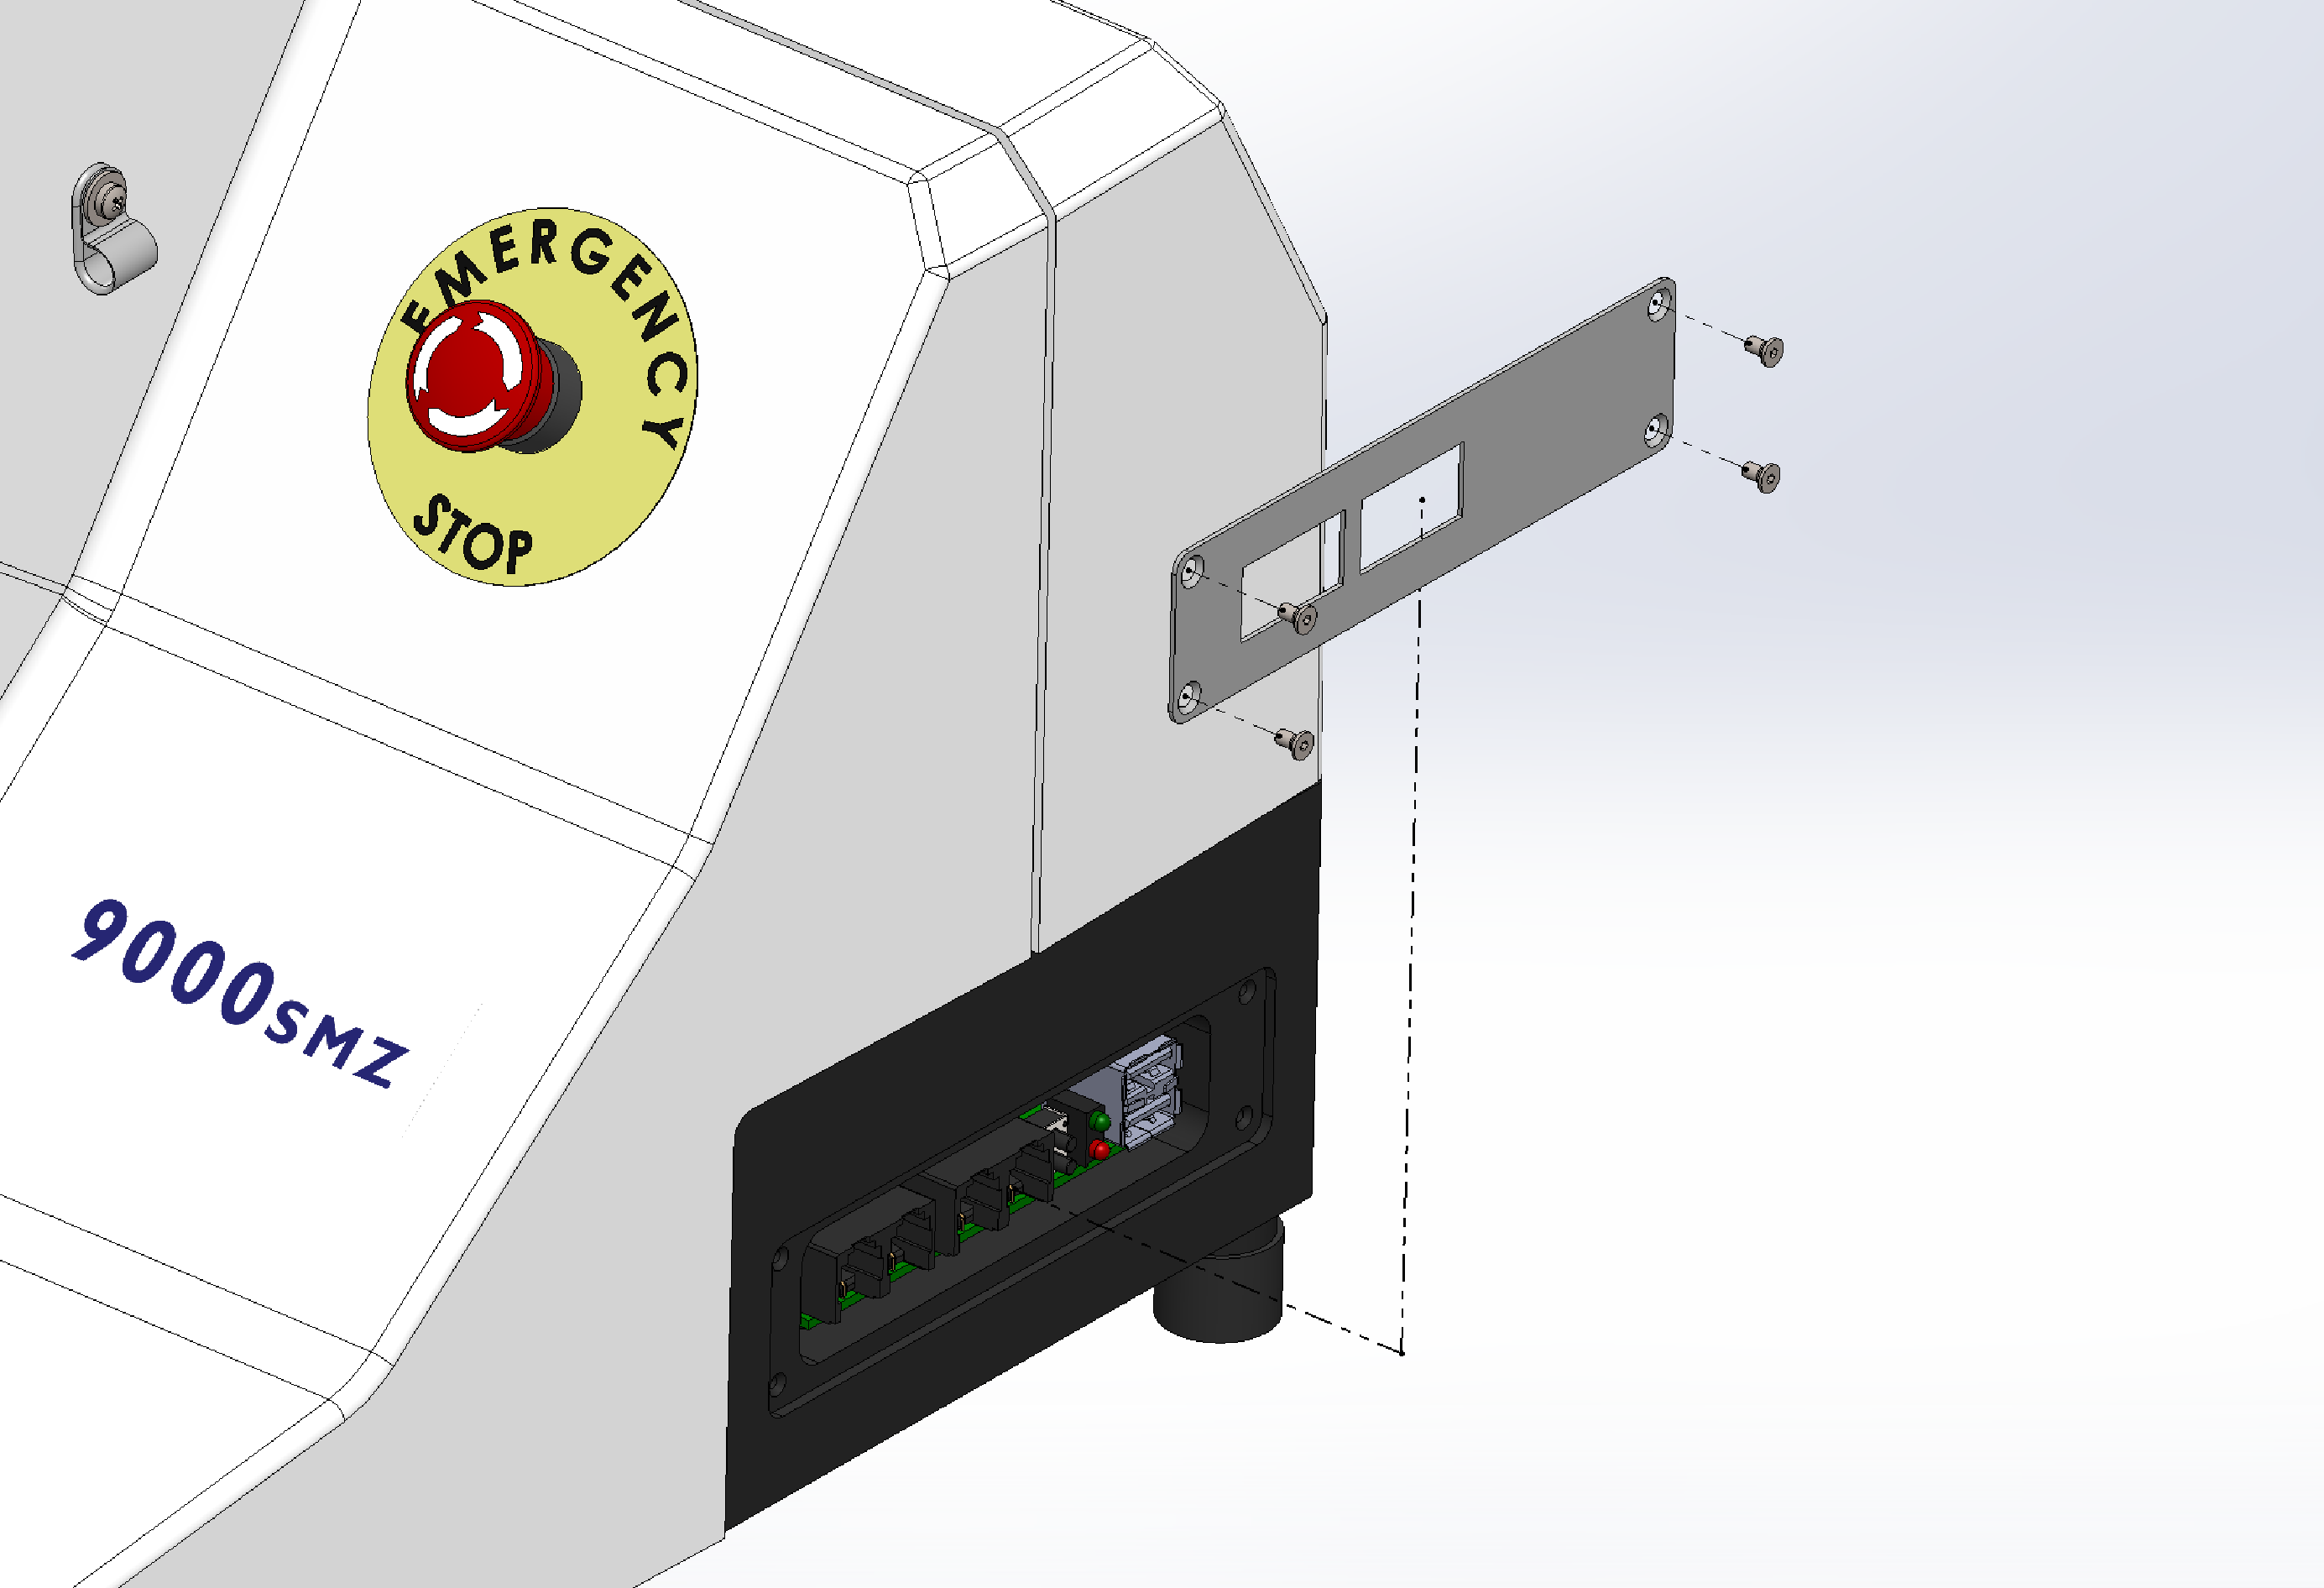
- Remove the Port Cover Pate using the 1.5mm hexagonal driver supplied in the Toolkit. Remove the four screws.
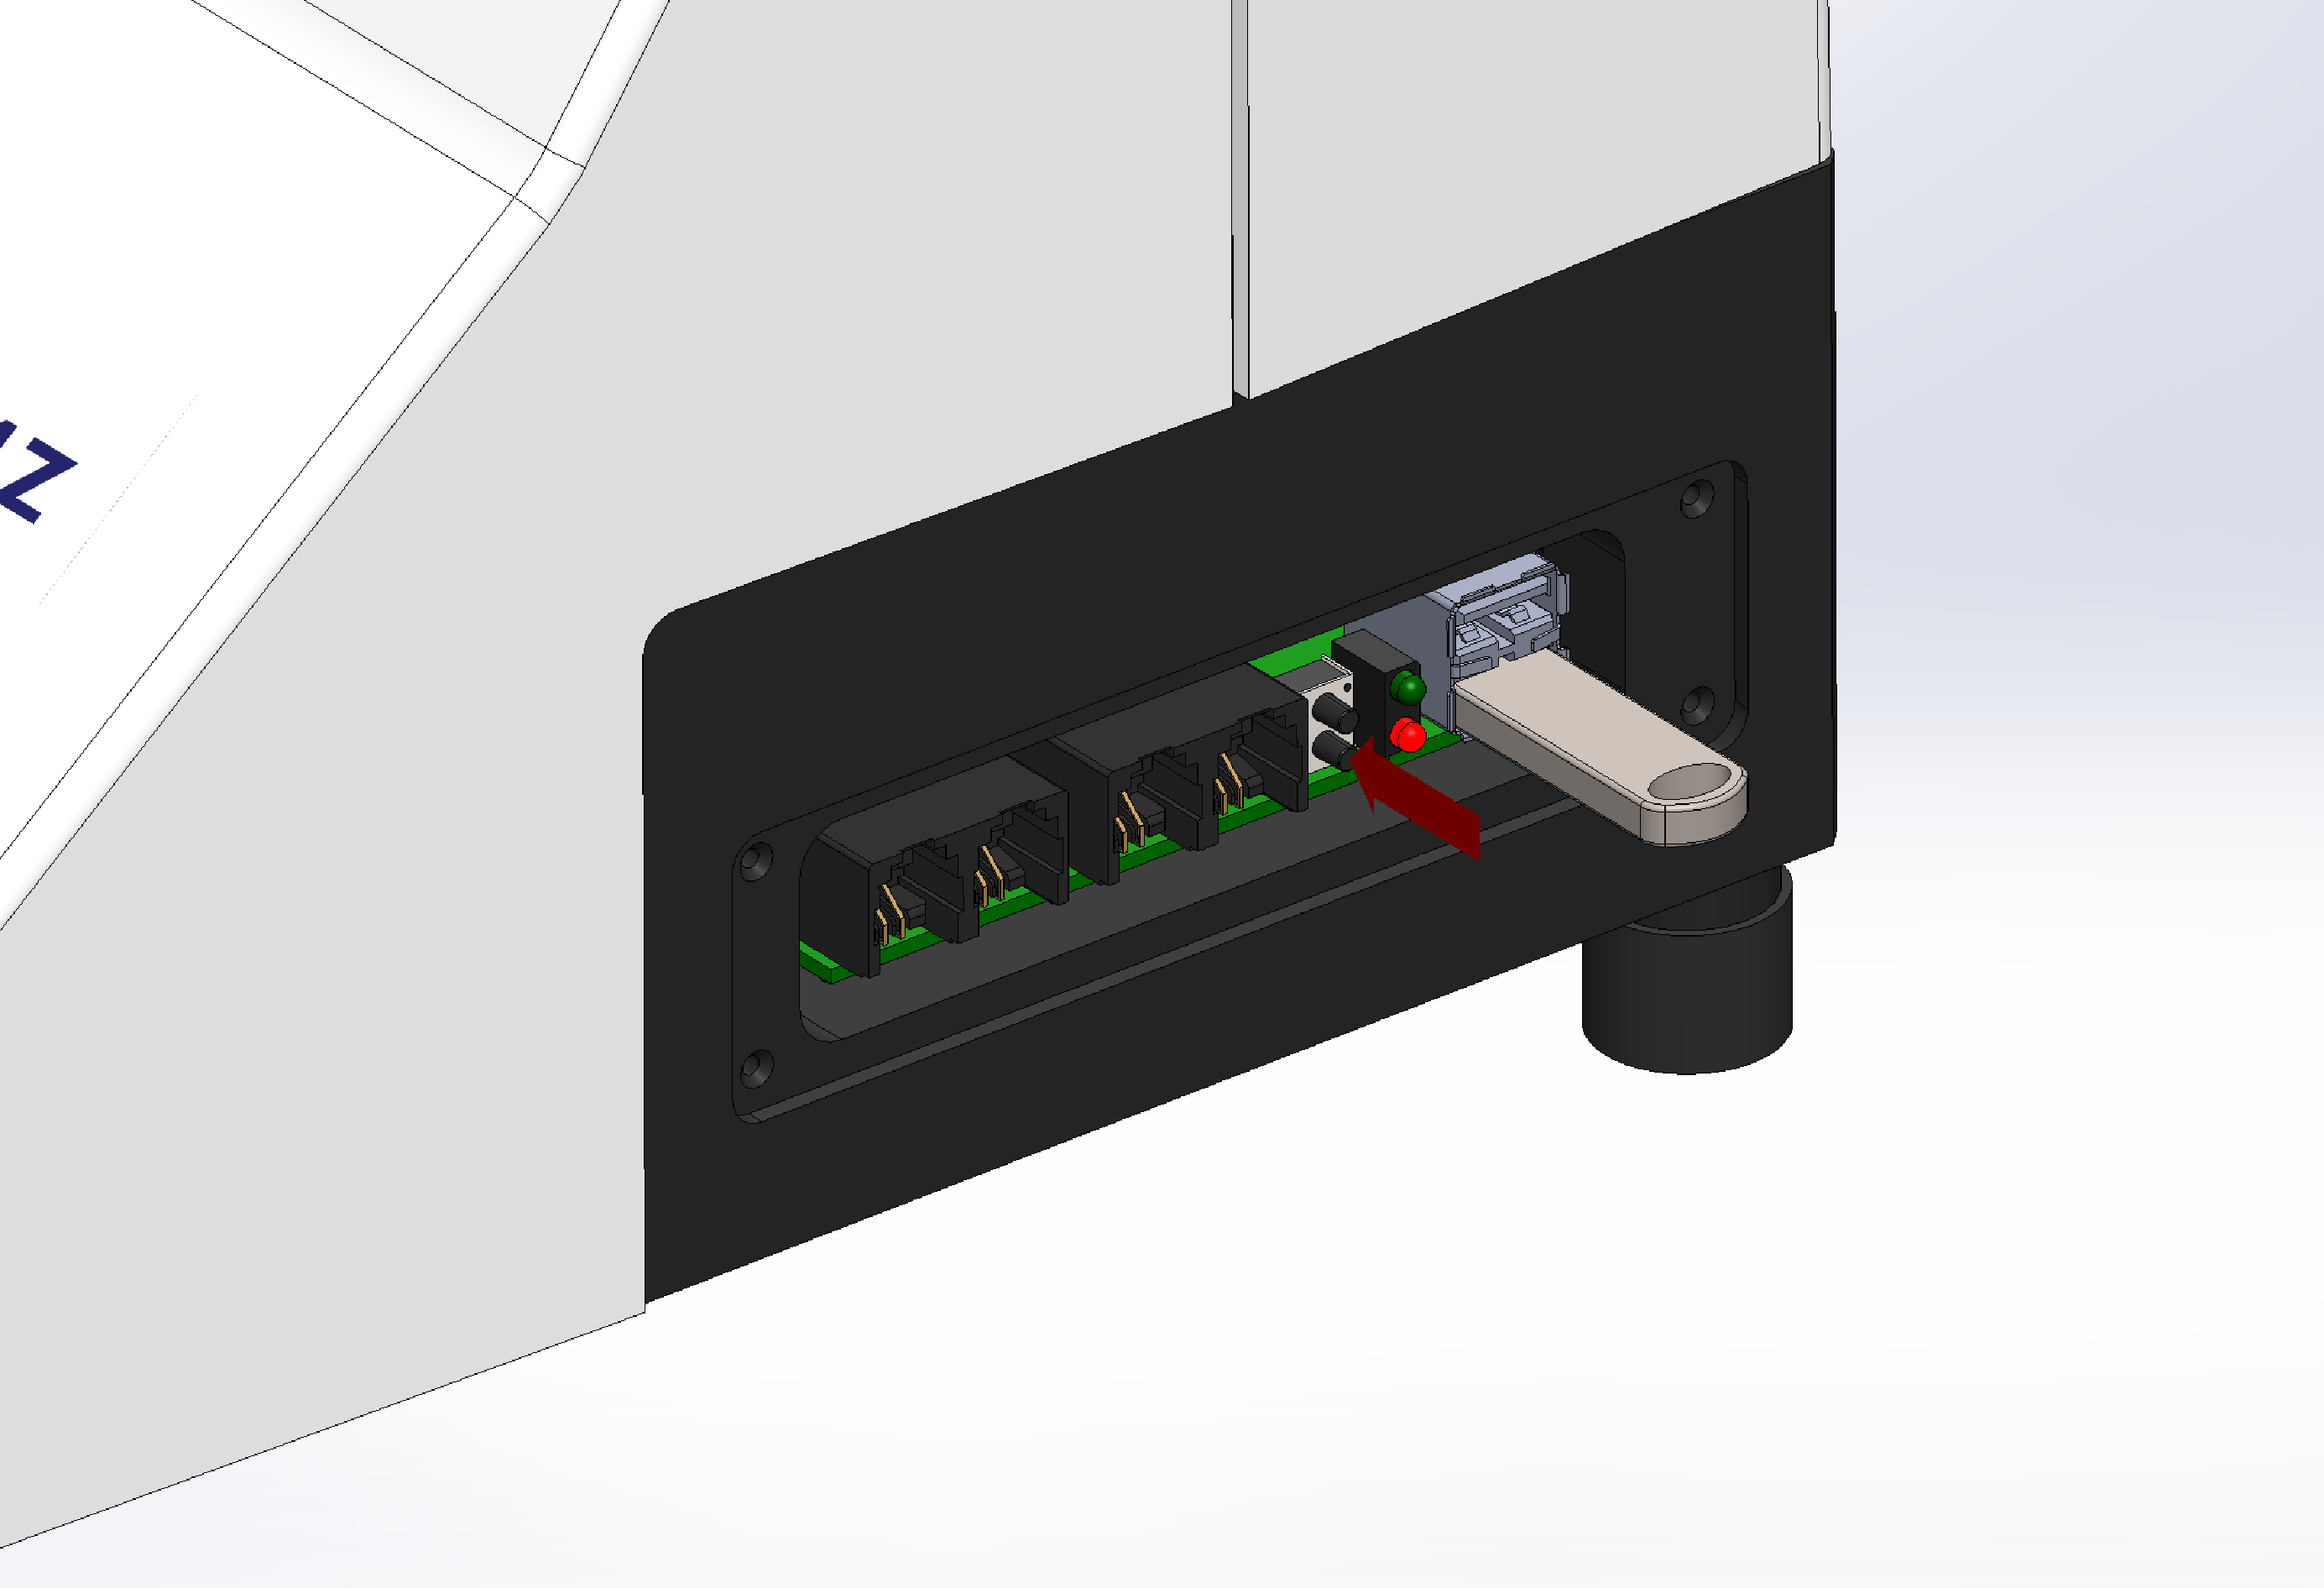
- Place supplied USB Flash Drive into the lower USB port on the 9000SMZ.
- Press and hold the bottom button.
- Whilst holding the bottom button, switch ON the 9000SMZ. The red LED will illuminate.
- Release the lower button. The red LED will flash indicating the firmware being downloaded. Please note that the Touchscreen will be OFF for a short period of time while the firmware is being updated.
- Wait until the red LED stops flashing (turns OFF) and the home screen is displayed on the touchscreen.
- Check that the Touchscreen in top left-hand corner displays M** (where ** is the new firmware revision number). The Main Board firmware has now been updated). DO NOT remove USB flash drive whilst the 9000SMZ is ON.
- Switch the 9000SMZ OFF.
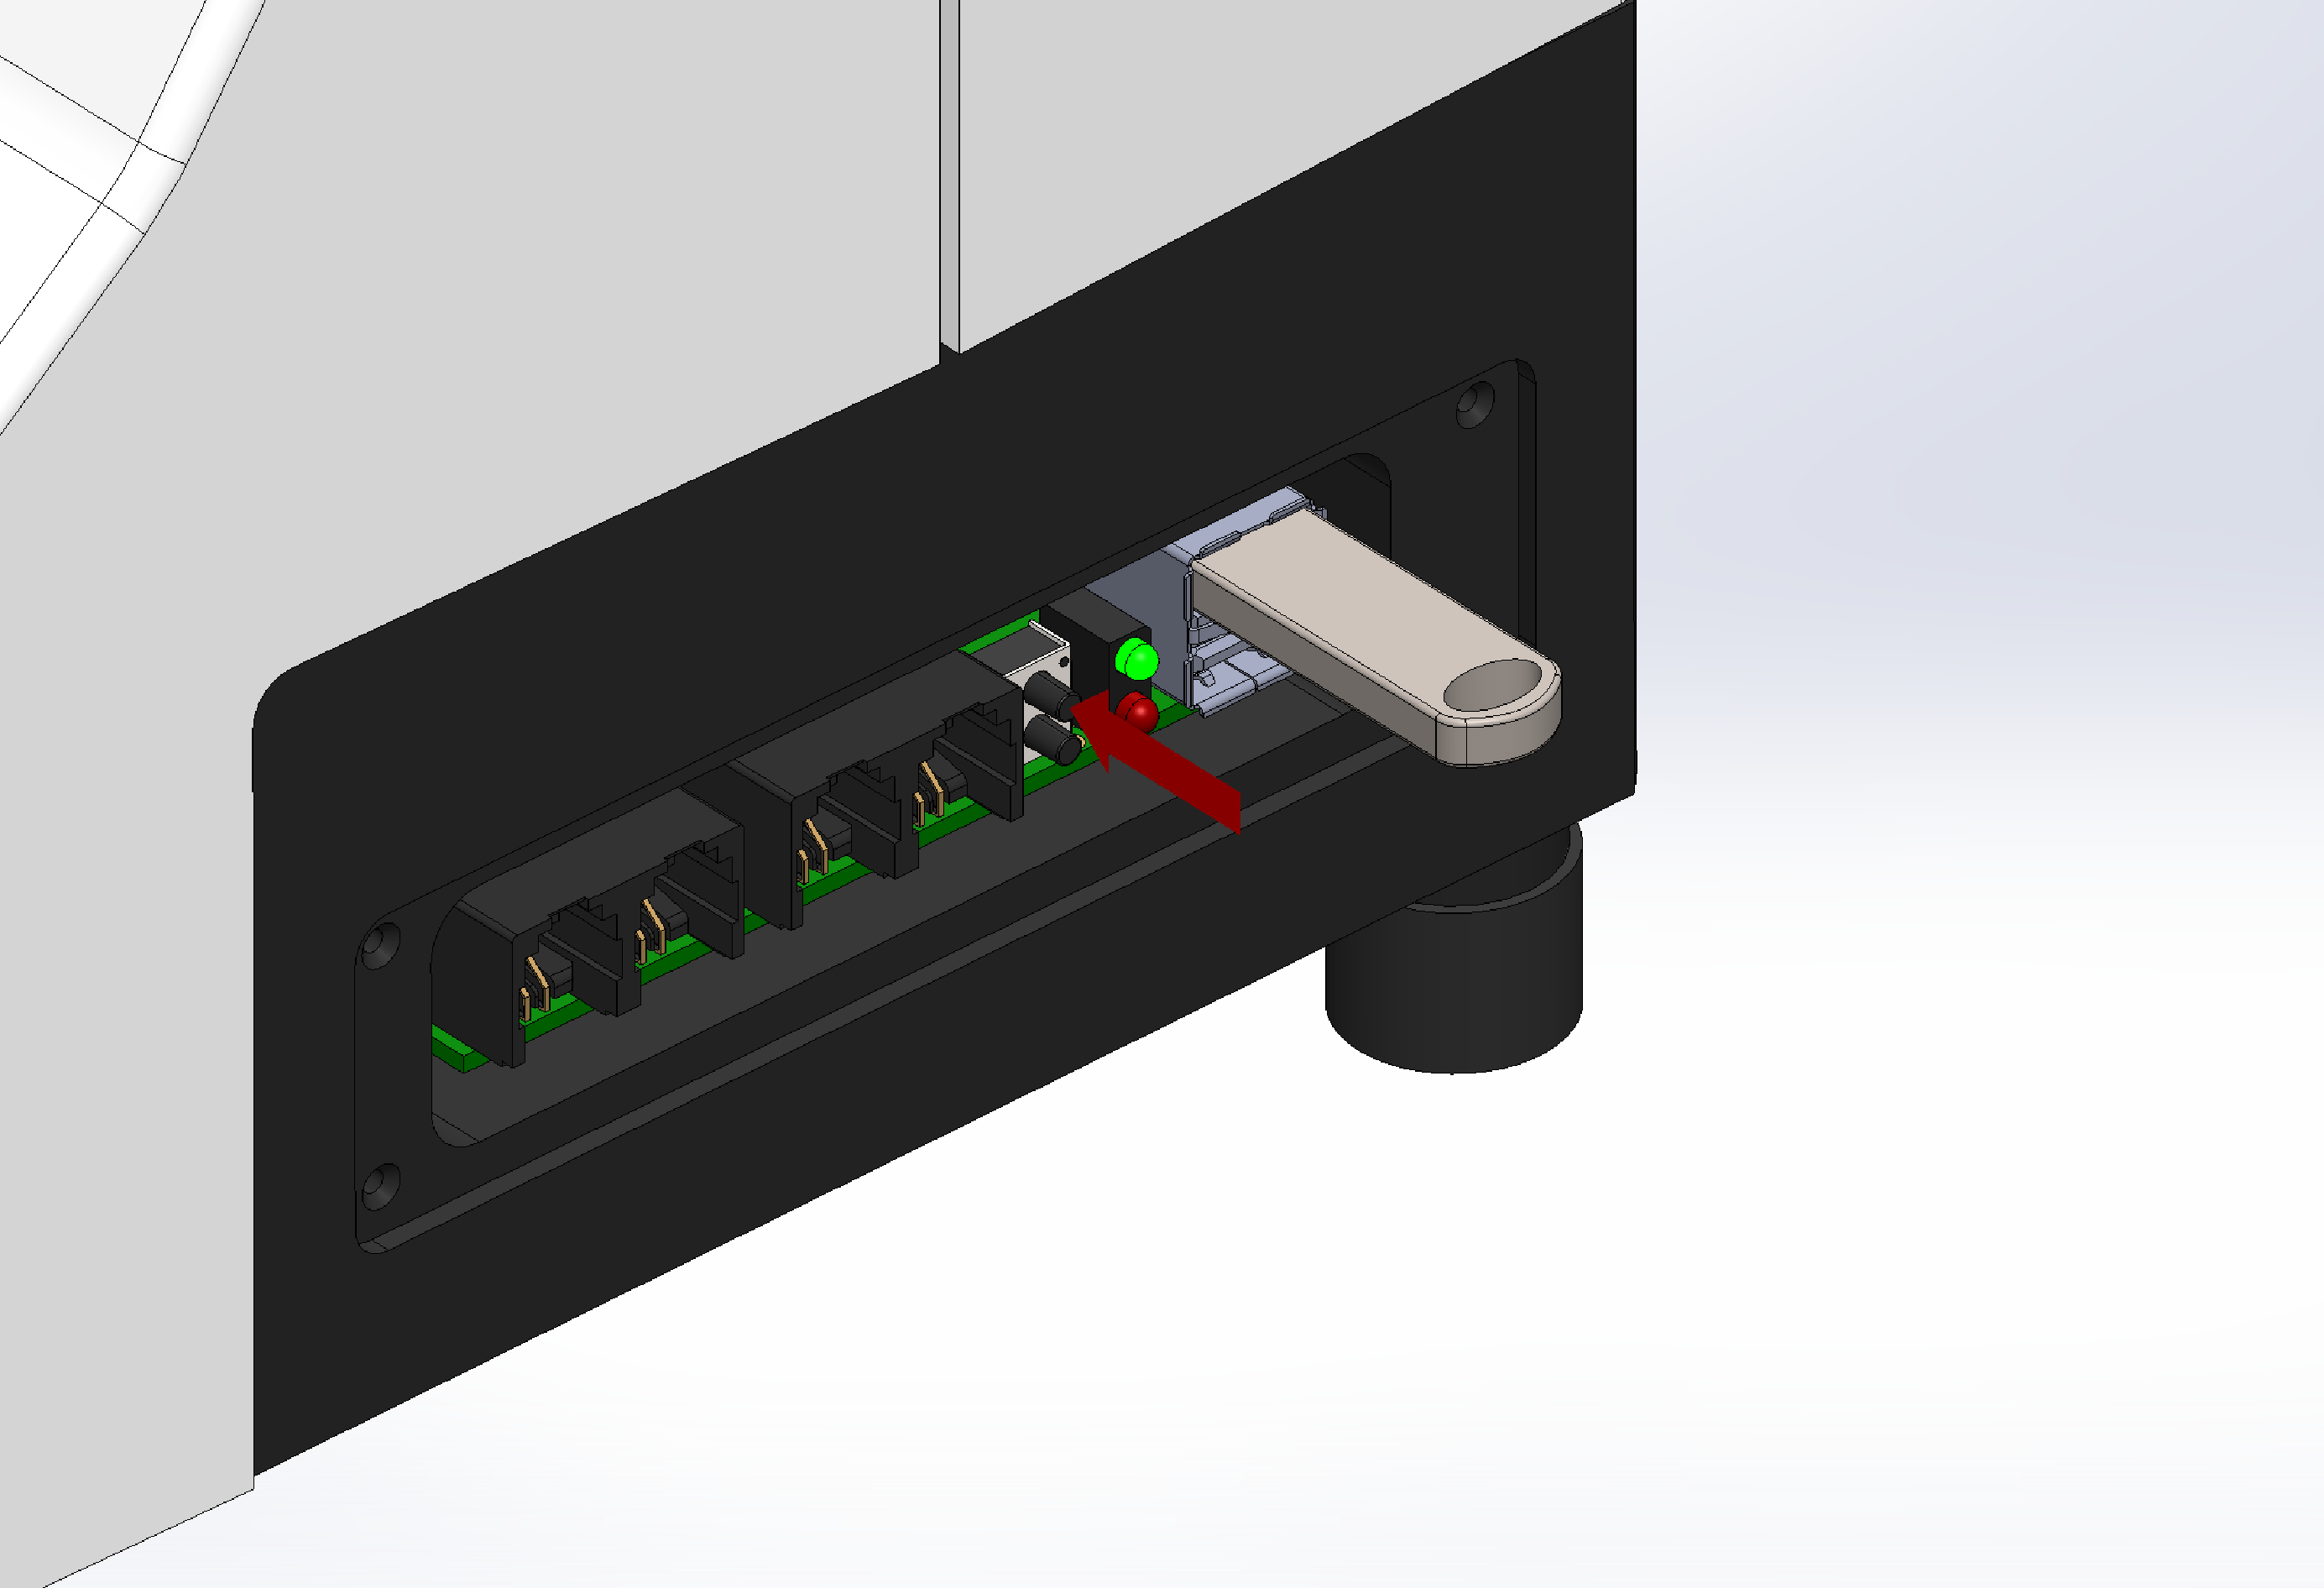
- Remove USB flash drive from the lower port and now insert it into the upper USB port.
- Press and hold the upper button.
- Whilst holding the upper button, switch ON the 9000SMZ. The green LED will illuminate.
- Release upper button and the green LED will flash indicating the firmware being download. Once again, the Touchscreen will be OFF for an extended time while the update occurs.
- Wait for the green LED to stop flashing (turns OFF) and for the home screen to be displayed.
- Check that the Touchscreen in top left-hand corner displays U**. The User board firmware has now been updated. DO NOT remove USB flash drive whilst 9000SMZ is ON.
- Switch the 9000SMZ OFF and remove the USB flash drive from the upper port.
- Replace the Port Cover Pate using the 1.5mm hexagonal driver supplied in the Toolkit to screw-in the four screws.